Mainline Stabilizers Made Easy: Step-by-Step Installation with Cost Insights
Many households and offices experience the problem of fluctuating voltage levels and these fluctuations can be very detrimental. Air conditioners, refrigerators, washing machines, and entertainment systems seem to be the ones that get affected the most. A Mainline stabilizer best protects these devices as it regulates the electricity supply before it enters the entire distribution system of a home or office. Just one unit and all the connected appliances are protected against sudden voltage changes.
What Makes Mainline Stabilizers Important?
Local stabilizers are devices that are connected to a specific electrical device. A Mainline stabilizer is connected to the central power line. This enables it to distribute power to the entire home or building.
♦ Benefits of a Mainline Stabilizer
- Every connected appliance is assured of a balanced voltage supply.
- Lost, low and excess voltage damages are significantly minimized.
- Over time, reduced electricity costs is gained.
- Electrical devices are more efficient and have a longer lifespan.
♦ Preparation Before Installation
Some groundwork is needed as a stabilizer requires a stabilizer. Smooth operation and risk mitigation is enhanced with proper preparation.
- Check Total Load – Determine the combined wattage of the appliances that you have. This simplifies the process of choosing the right KVA capacity.
- Choose the right model – Pick out a stabilizer that fits your total power requirement. For homes with several high-load appliances, a higher capacity model is advised.
- Keep the tools ready – Pliers, screwdrivers, testers, and insulation tape are the commonly required tools. These are the tools most installers will have, but having them on hand doesn’t hurt.
♦ Step-by-Step Installation Guide
As mentioned before, a stabilizer should be installed with the most care, as its function is to connect to the main current supply.
1. Select an Installation Spot
- Select a dry, ventilated location.
- Stay out of direct sunlight and damp areas.
- The installation site should be a reasonable height that will be safe from water and from being accidentally damaged.
2. Turn off the main power supply.
As with any device, the electricity should be turned off before any connections are made to ensure safety.
3. Mount the Stabilizer
Preferably, the stabilizer should be mounted to the wall. This helps with space, and the stabilizer is safer from being knocked over.
4. Make the Connections
- Your stabilizer should have its input wires connected to the incoming main power supply.
- The output wires to the main distribution board.
- As a safety measure, use good wires to avoid any safety complications.
5. Grounding Setup
In order to have a proper functional device, the current leakage must be put to a minimum and the device safe to use.
6. Confirming the right setup
The main supply should be turned on, and the stabilizer should be closely observed. It is important that the voltage readings on the stabilizer remain stable before the power flows down to the appliances.
♦ Safety Measures During Installation
Every task that deals with electricity comes with the need for safety precautions. A few important ones include the following:
- Before any installation work can commence, the power supply must be cut.
- Make use of insulated tools strictly.
- Make sure that there proper earthing is done for safety.
- Never exceed the appliance limit of the stabilizer.
- If the wiring is complicated, professional installation is recommended
While professional installation is an additional expense, it provides peace of mind knowing the operation is safe an nd is reliable for years to come.
♦ Mainline Stabilizer Cost and Price Factors
The Mainline stabilizer cost depends on several factors. Understanding these helps in making the right purchase decision.
→ Features and Technology
- Stabilizers that offer more advanced features such as automatic cut-off, surge protection, or have LED displays will cost more.
→ Brand and Warranty
- Market-leading brands with extended warranty periods will cost a bit more, these brands offer peace of mind with their reliable products and good after sales service.
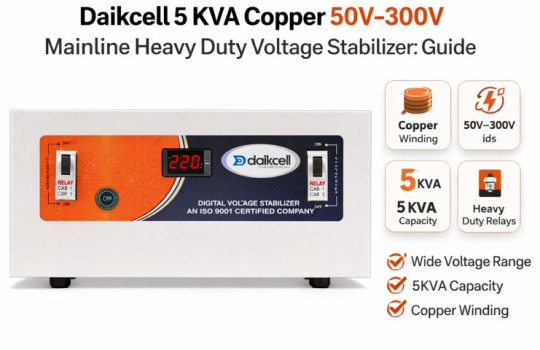
♦ Daikcell Mainline Stabilizer Price Range
- Entry-Level Stabilizers (3 KVA – 5 KVA): These are suitable for basic home use with fewer heavy appliances.
Approximate Price Range: ₹7,499 – ₹12,499
2. Mid-Range Stabilizers (7.5 KVA – 8 KVA): Ideal for homes with multiple air conditioners and other high-wattage appliances.
Approximate Price Range: ₹10,999 – ₹22,999
3. High-Capacity Models (10 KVA – 15 KVA & 20 KVA ): Designed for larger homes or establishments with significant power loads.
10 KVA Models: ₹12,999 – ₹27,999 | 15 KVA Models: ₹27,999 – ₹39,999 | 20 KVA Models: ₹39,999 – 49,999
Note – It’s always a good idea to check the official Daikcell website directly for the most current pricing and to see if any discounts are available.
♦ Overhaul the Unit for Longevity
Stabilizers need a bit of effort to ensure that all of them work optimally for many years.
- Routine checks: Look out for signs of faulty wiring or loose connections.
- Heat Build Up: The stabilizer should be cleaned to avoid the build up of dust.
- Trends Analysis: Be on the lookout for major spikes or dips on the display.
- Routine checks: Have the unit checked to ensure it is functioning properly once every 10 months.
With the exception of the last point, taking all steps above consistently should result in a decrease in mechanical breakdowns.
♦ Central to Homeowners dilemmas
- DIY Installation: This is best suited for individuals who are comfortable with basic wiring and the necessary safety precautions.
- Installation by Professional: This is best suited for individuals with heavy duty stabilizers, or individuals with congested electrical systems at home.
In the end, it comes down to personal abilities, and the stabilizers complexity.
♦ Maintenance for Long Life
Once installed, a stabilizer needs proper care to function effectively for years.
- Regular Checks: Inspect wiring and connections from time to time.
- Dust Protection: Keep the stabilizer clean to avoid overheating.
- Monitor Readings: Watch the display for unusual fluctuations.
- Annual Servicing: Schedule servicing to ensure stable performance.
Consistent maintenance reduces the chances of failure and keeps the system operating efficiently.
♦ Choosing Professional or DIY Installation
Homeowners often debate between doing it themselves and hiring professionals.
- DIY Installation: Works if you are confident with basic wiring and safety practices. Suitable for small-capacity stabilizers.
- Professional Installation: Recommended for high-capacity stabilizers or complex home electrical systems. Provides added assurance of safety.
The choice depends on personal skill level and the stabilizer’s complexity.